Need to submit artwork with Illustrator for business cards or another printing project? Here’s how to set up artwork with Illustrator CS5.
Creating the Art Board and Bleed Settings using Illustrator CS5
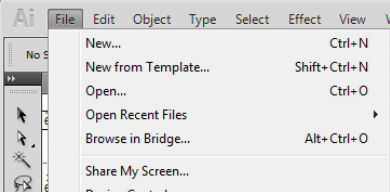
Create a new file
Number of Artboards An artboard is like a digital canvas. It shows you the final size of the printed piece. If you need many different version or want to do a front and back, you can make multiple artboards. With multiple artboards you can work on them without having to recreate everything multiple times.
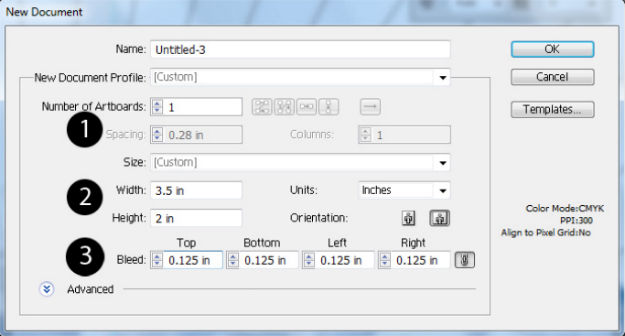
Size of the Artboards (units) In the example above we have it set up a business card size (3.5 x 2).
Bleed Settings This is where you would set up your bleeds. It should be 0.125 in each direction.
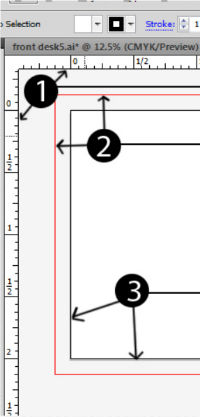
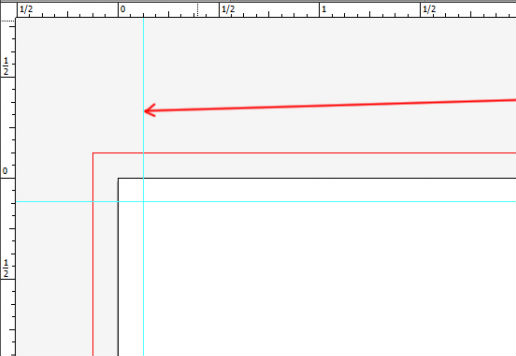
Use guides to create the interior bleed margin. See the photo on the left.
1. Rulers: You will need these on so you can create your guide lines. These are also here to double check that you have set up your sizing correctly. It can be turned on by either going to View>Show rulers, or by hitting Ctrl+R.
2. Bleed line: This red line is the bleed line. If you have any image or colour extending to the edge of the card, you will need to extend whatever colour or image past the artboard all the way to at least the red line for proper bleed
3. Artboard: This is where the file is cut.
Setting up a guide The little blue line (see below) is the guide line. It acts as an unprinted guide mark. Avoid placing information too close to the edge of the file.
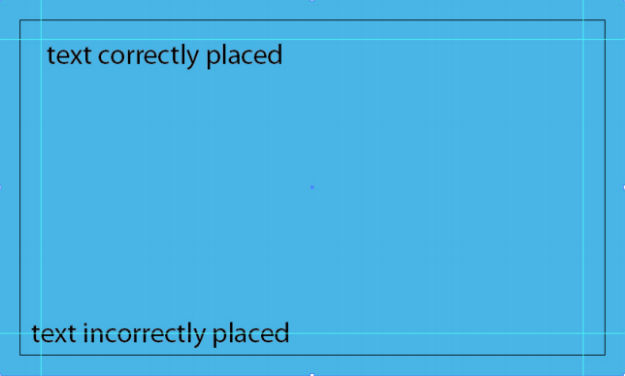
Below is an example of some correct and incorrect text placement. Notice how the guides function. The incorrectly setup text is crossing the guide putting it in risk of being being cut.
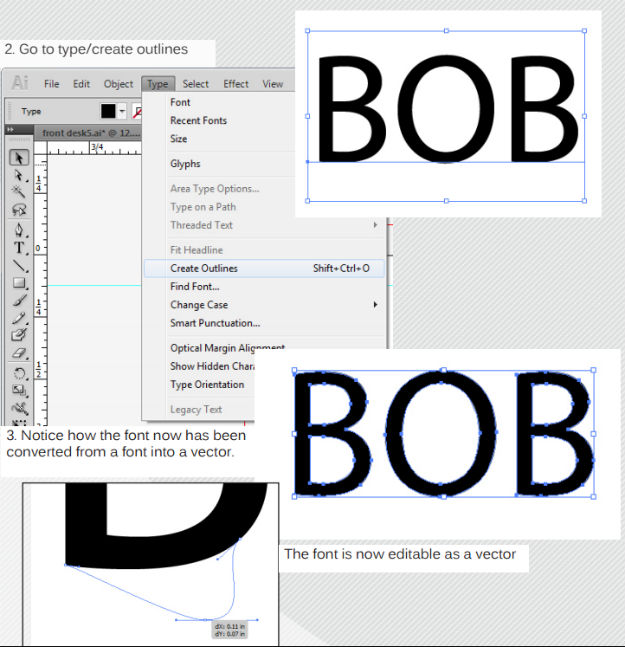
Converting Fonts to Outlines. One thing about using fonts in Illustrator is that if you don’t convert your fonts to outlines you have a chance of having missing font when it goes to another computer or if it needs to be edited. Some people just save the file as a PDF to lock the fonts. However, this isn’t a failproof method as fonts can be lost during the pre-press process
1. After you have set up your card and have all the fonts laid out. Select the fonts.
Exporting the finished design as a PDF
Go to File>Save As. Change the save source to be .pdf.
General Tab:
- Preserve Illustrator Editing Capabilities
- View PDF after Exporting
Compression Tab:
- Color Images: Bicubic Downsampling to 300 ppi (for images above 350 ppi) Compression: Zip
- Grayscale Images: Bicubic Downsampling to 300 ppi (for images above 350 ppi) Compression: Zip
- Monochrome Images: Bicubic Downsampling to 1200 ppi (for images above 1800 ppi)

Marks and Bleeds Tab:
- Trim Marks Printer Mark
- Type: Roman
- Weight: 0.25pt
- Offset: 0.083 in
- Bleeds: Set Bleeds to 0.125 in for all four sides (Top, Bottom, Left and Right)

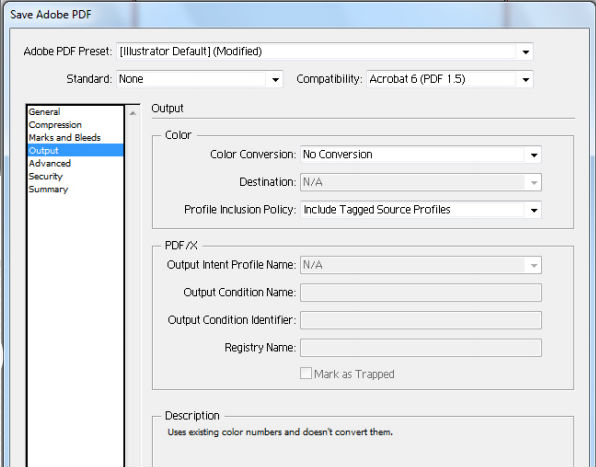
Output Tab:
- Color Conversion: No Conversion
- Profile Inclusion Policy: Include Tagged Source Profiles
- (Please do not use any restriction passwords, as this will possibly affect our ability to output your file)
- For Future Reference you can “Save Preset” for future use. We recommend saving this preset as “PrintPrint.”